


📌 Before you start
This hands-on walkthrough uses a Developer Edition org. The same steps can serve as a starting point for Scratch, Sandbox, and Production orgs, although some org-specific configuration may be required.

For additional details and the latest guidance, refer to Salesforce's official Multi-Framework documentation.
If you've been in the Salesforce ecosystem for more than a few years, you've probably had this conversation at least once: a React developer joins the team, looks at Lightning Web Components, and asks, "Why can't I just... write React?"
For a long time, the honest answer was "you can't, not really, not natively." You could bolt on an external app, spin up a Heroku site, or fight your way through Experience Cloud. None of it felt like it belonged on the platform.
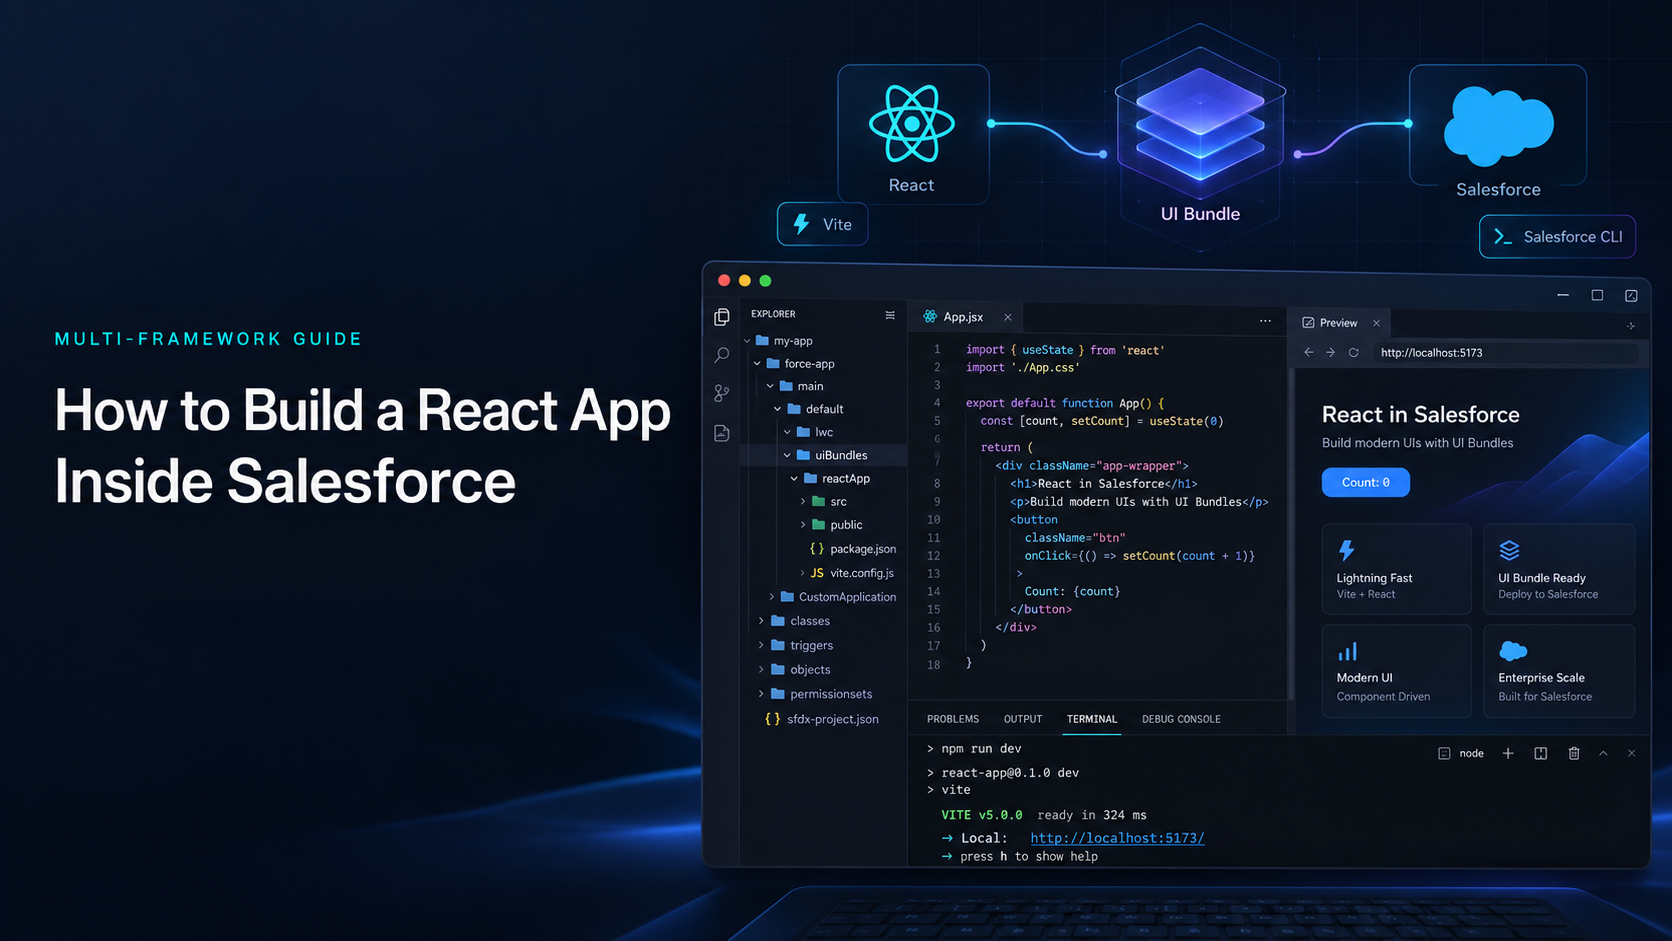
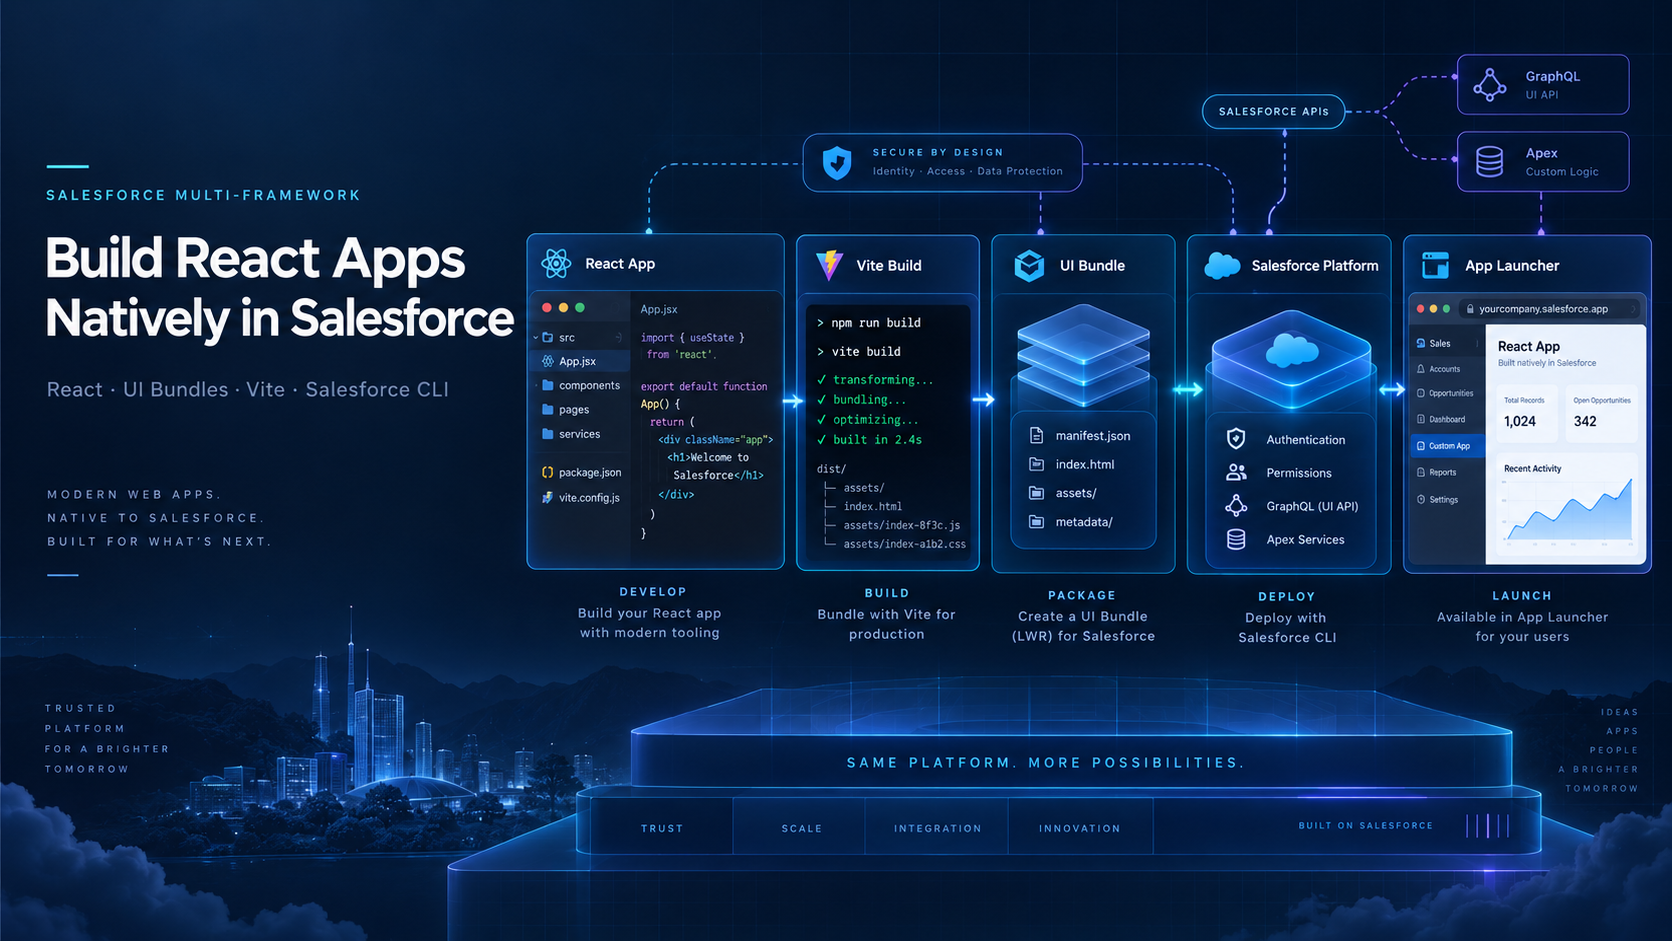
That changed with Salesforce Multi-Framework, which went GA in July 2026 (it had been in open beta since April). It introduces a new metadata type, the UI Bundle, that lets you build a real, standard React app with Vite, deploy it straight into your org, and have it show up in the App Launcher like any other Salesforce app. No custom domain. No bridging React's lifecycle into LWC. It just runs, natively, right next to your Lightning Web Components.
What Is Salesforce Multi-Framework, Really?
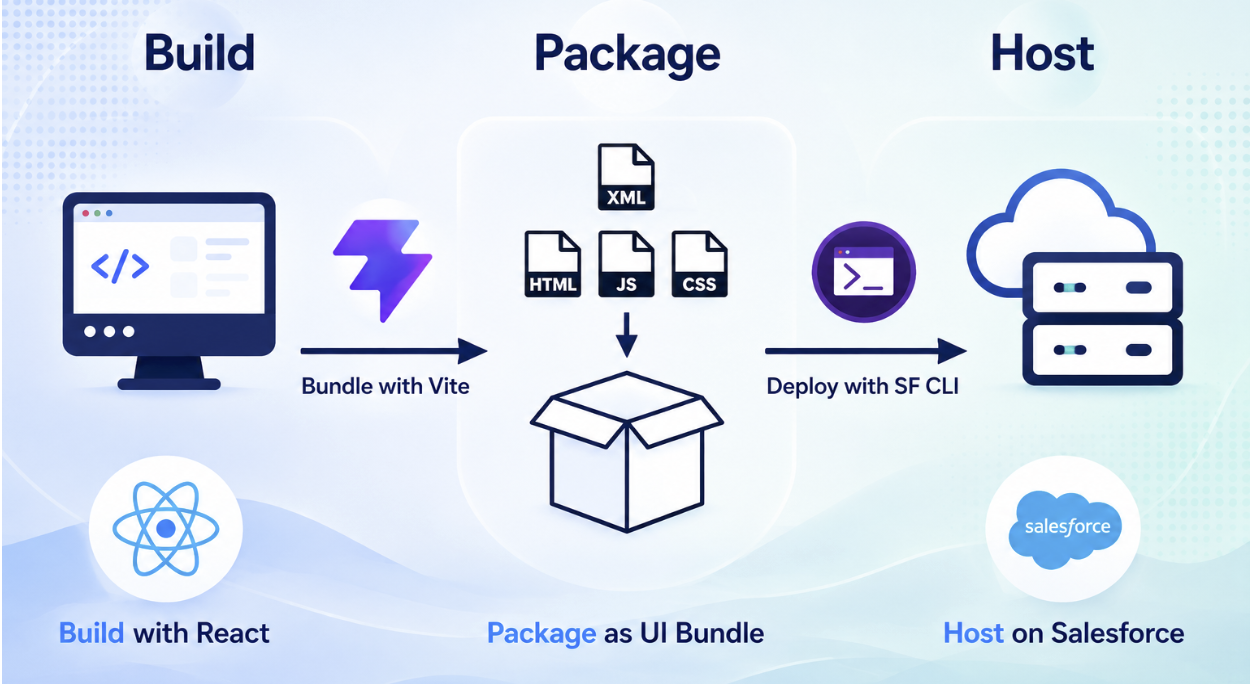
Multi-Framework doesn't wrap React components inside LWC, and it doesn't replace LWC either. It runs alongside it, on what Salesforce calls the Headless 360 Platform. You write a normal React app; it gets built into static assets; those assets get packaged into a UI Bundle; and Salesforce serves that bundle from its own dedicated domain, salesforce.app, with authentication, data access, and governance already wired in.
That last part matters for architects: because each app runs on its own origin, the browser's Same-Origin Policy does the isolation work for you. One app can't reach into another's cookies or storage. You're not relying on some proprietary sandbox, it's just how browsers already work.
Under the hood, your app talks to Salesforce through the Data SDK (@salesforce/platform-sdk), which lets you run GraphQL queries and mutations against your org's data, call Apex, and read user context all without hand-rolling OAuth or token management.
Prerequisites: What You Need Before You Start
Nothing here is exotic, but skipping any one of these will cost you an hour of confused debugging.
Step-by-Step: Building Your First Internal React App
1. Open your project folder in VS Code
Open the folder where you want the project to live.
2. Open the Command Palette
Mac: Shift + Cmd + P · Windows: Shift + Ctrl + P
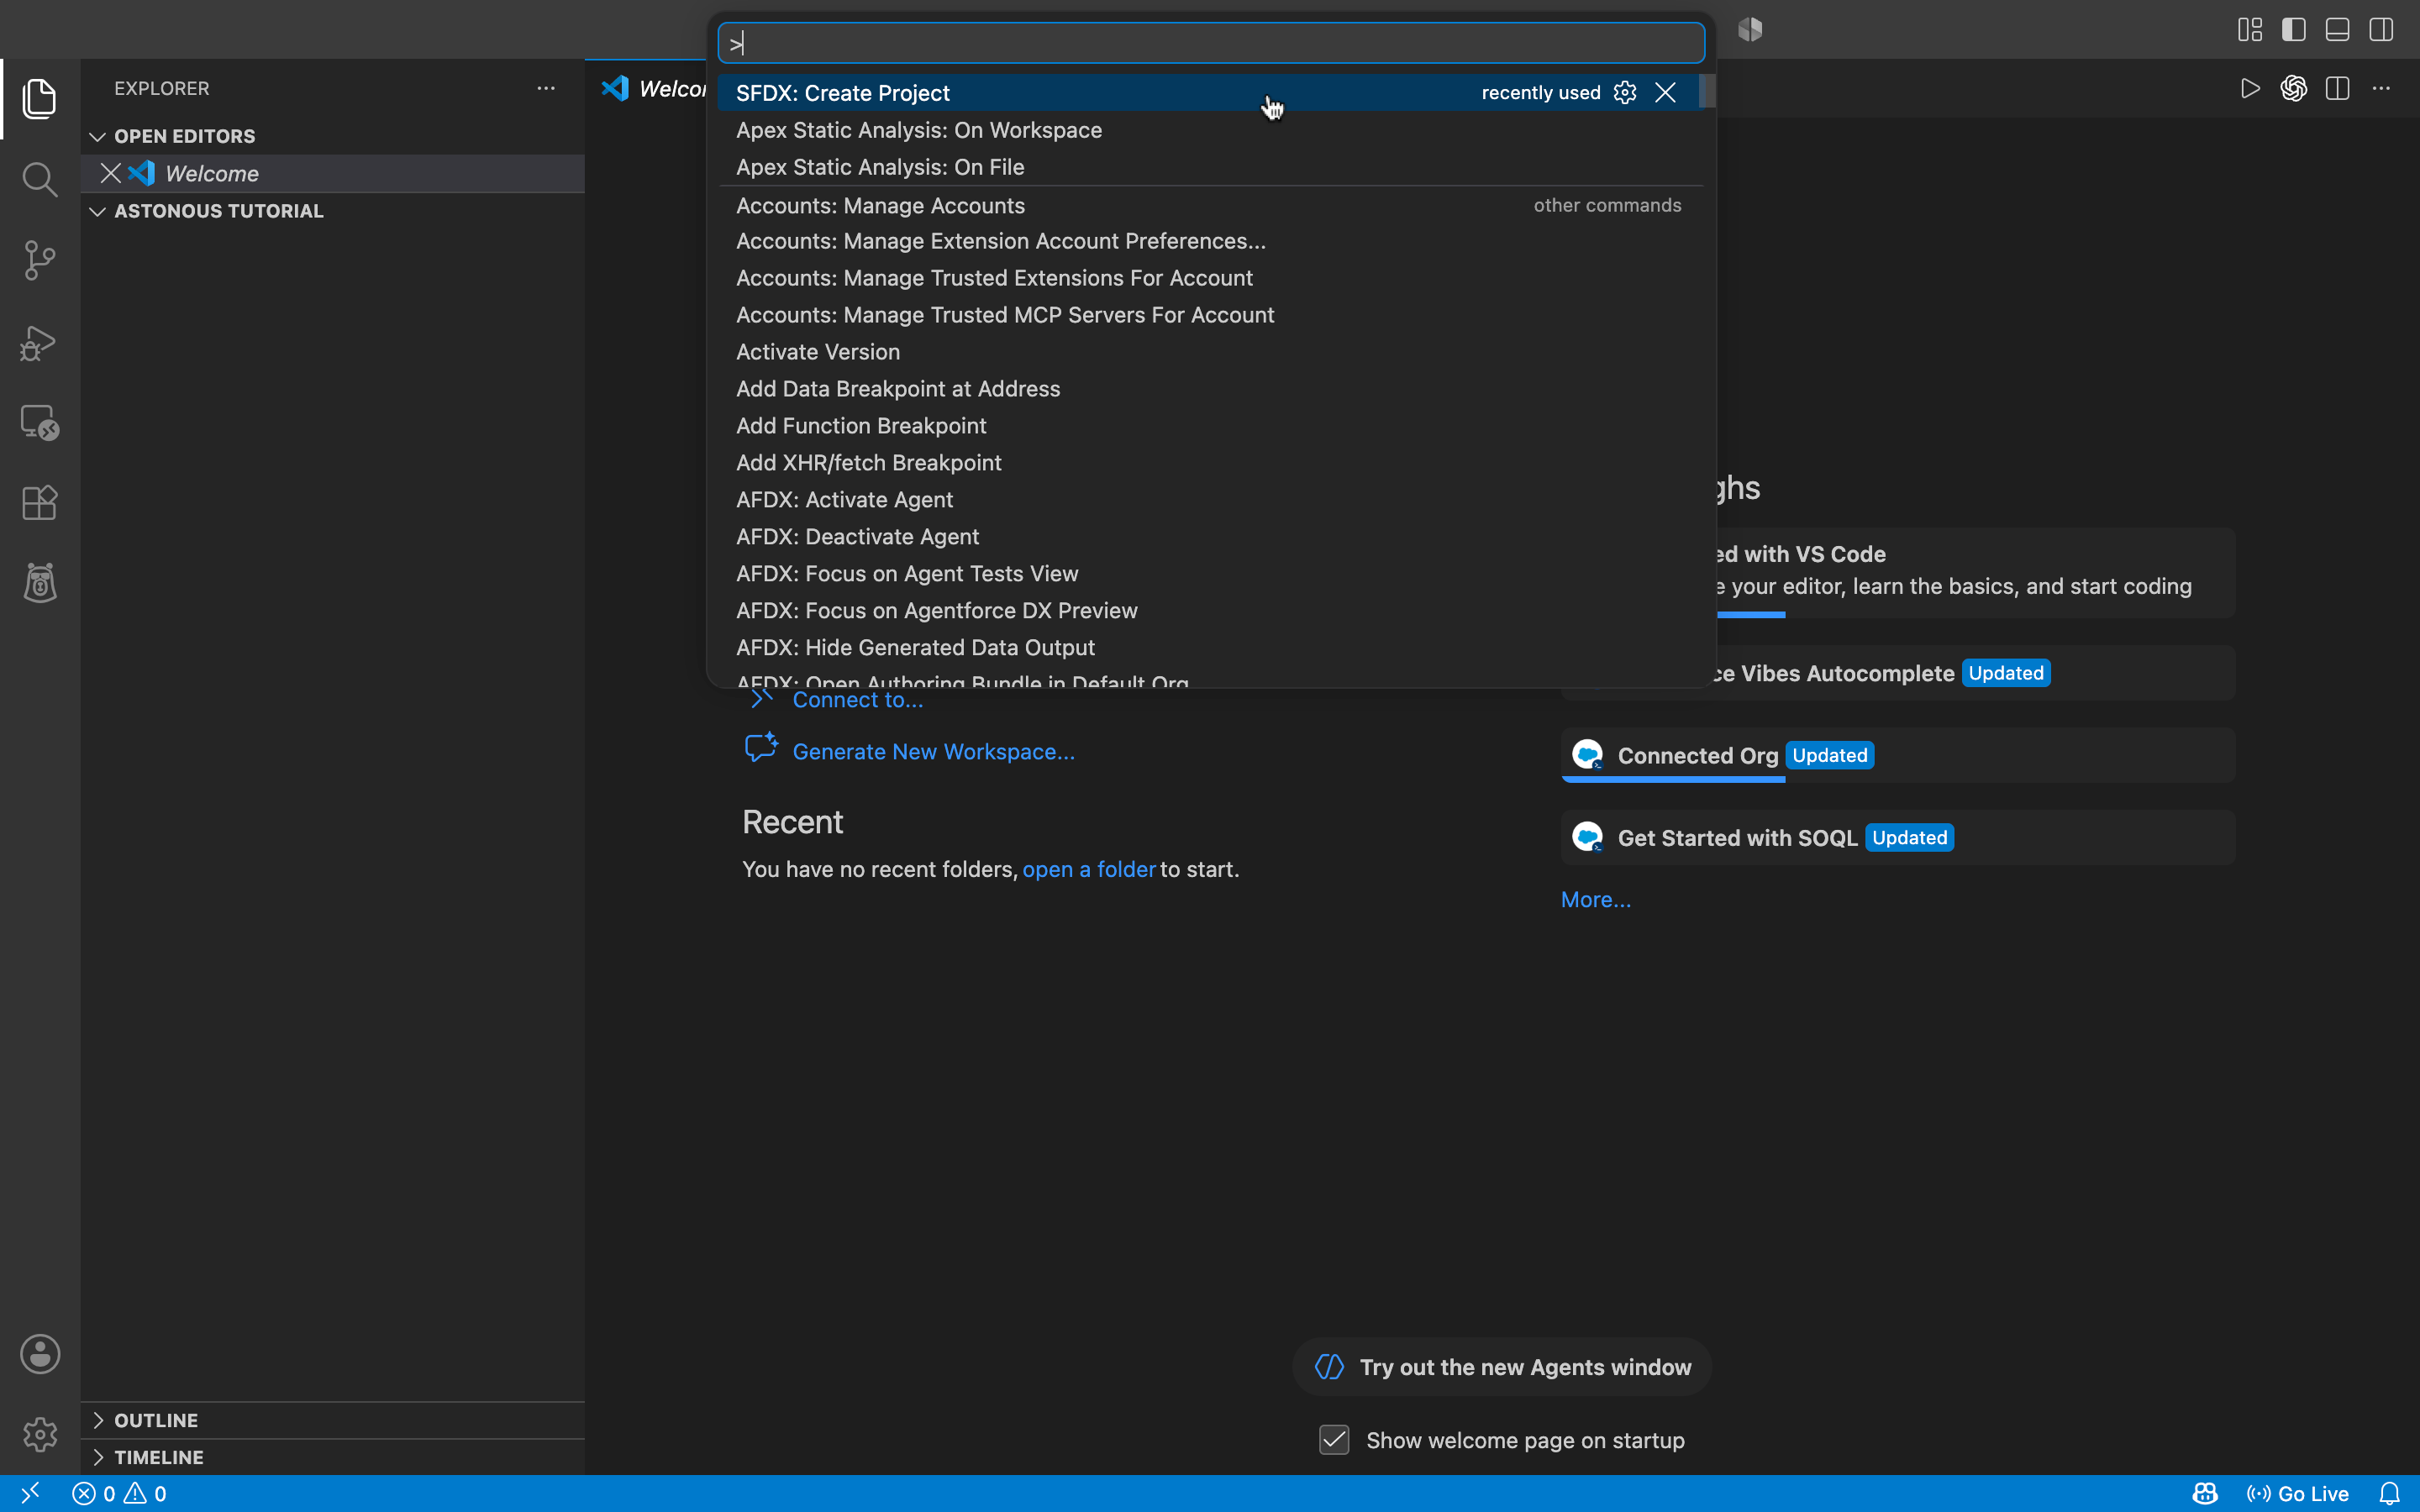
3. Run the project creation command
Search for "Create Project" and select SFDX: Create Project.
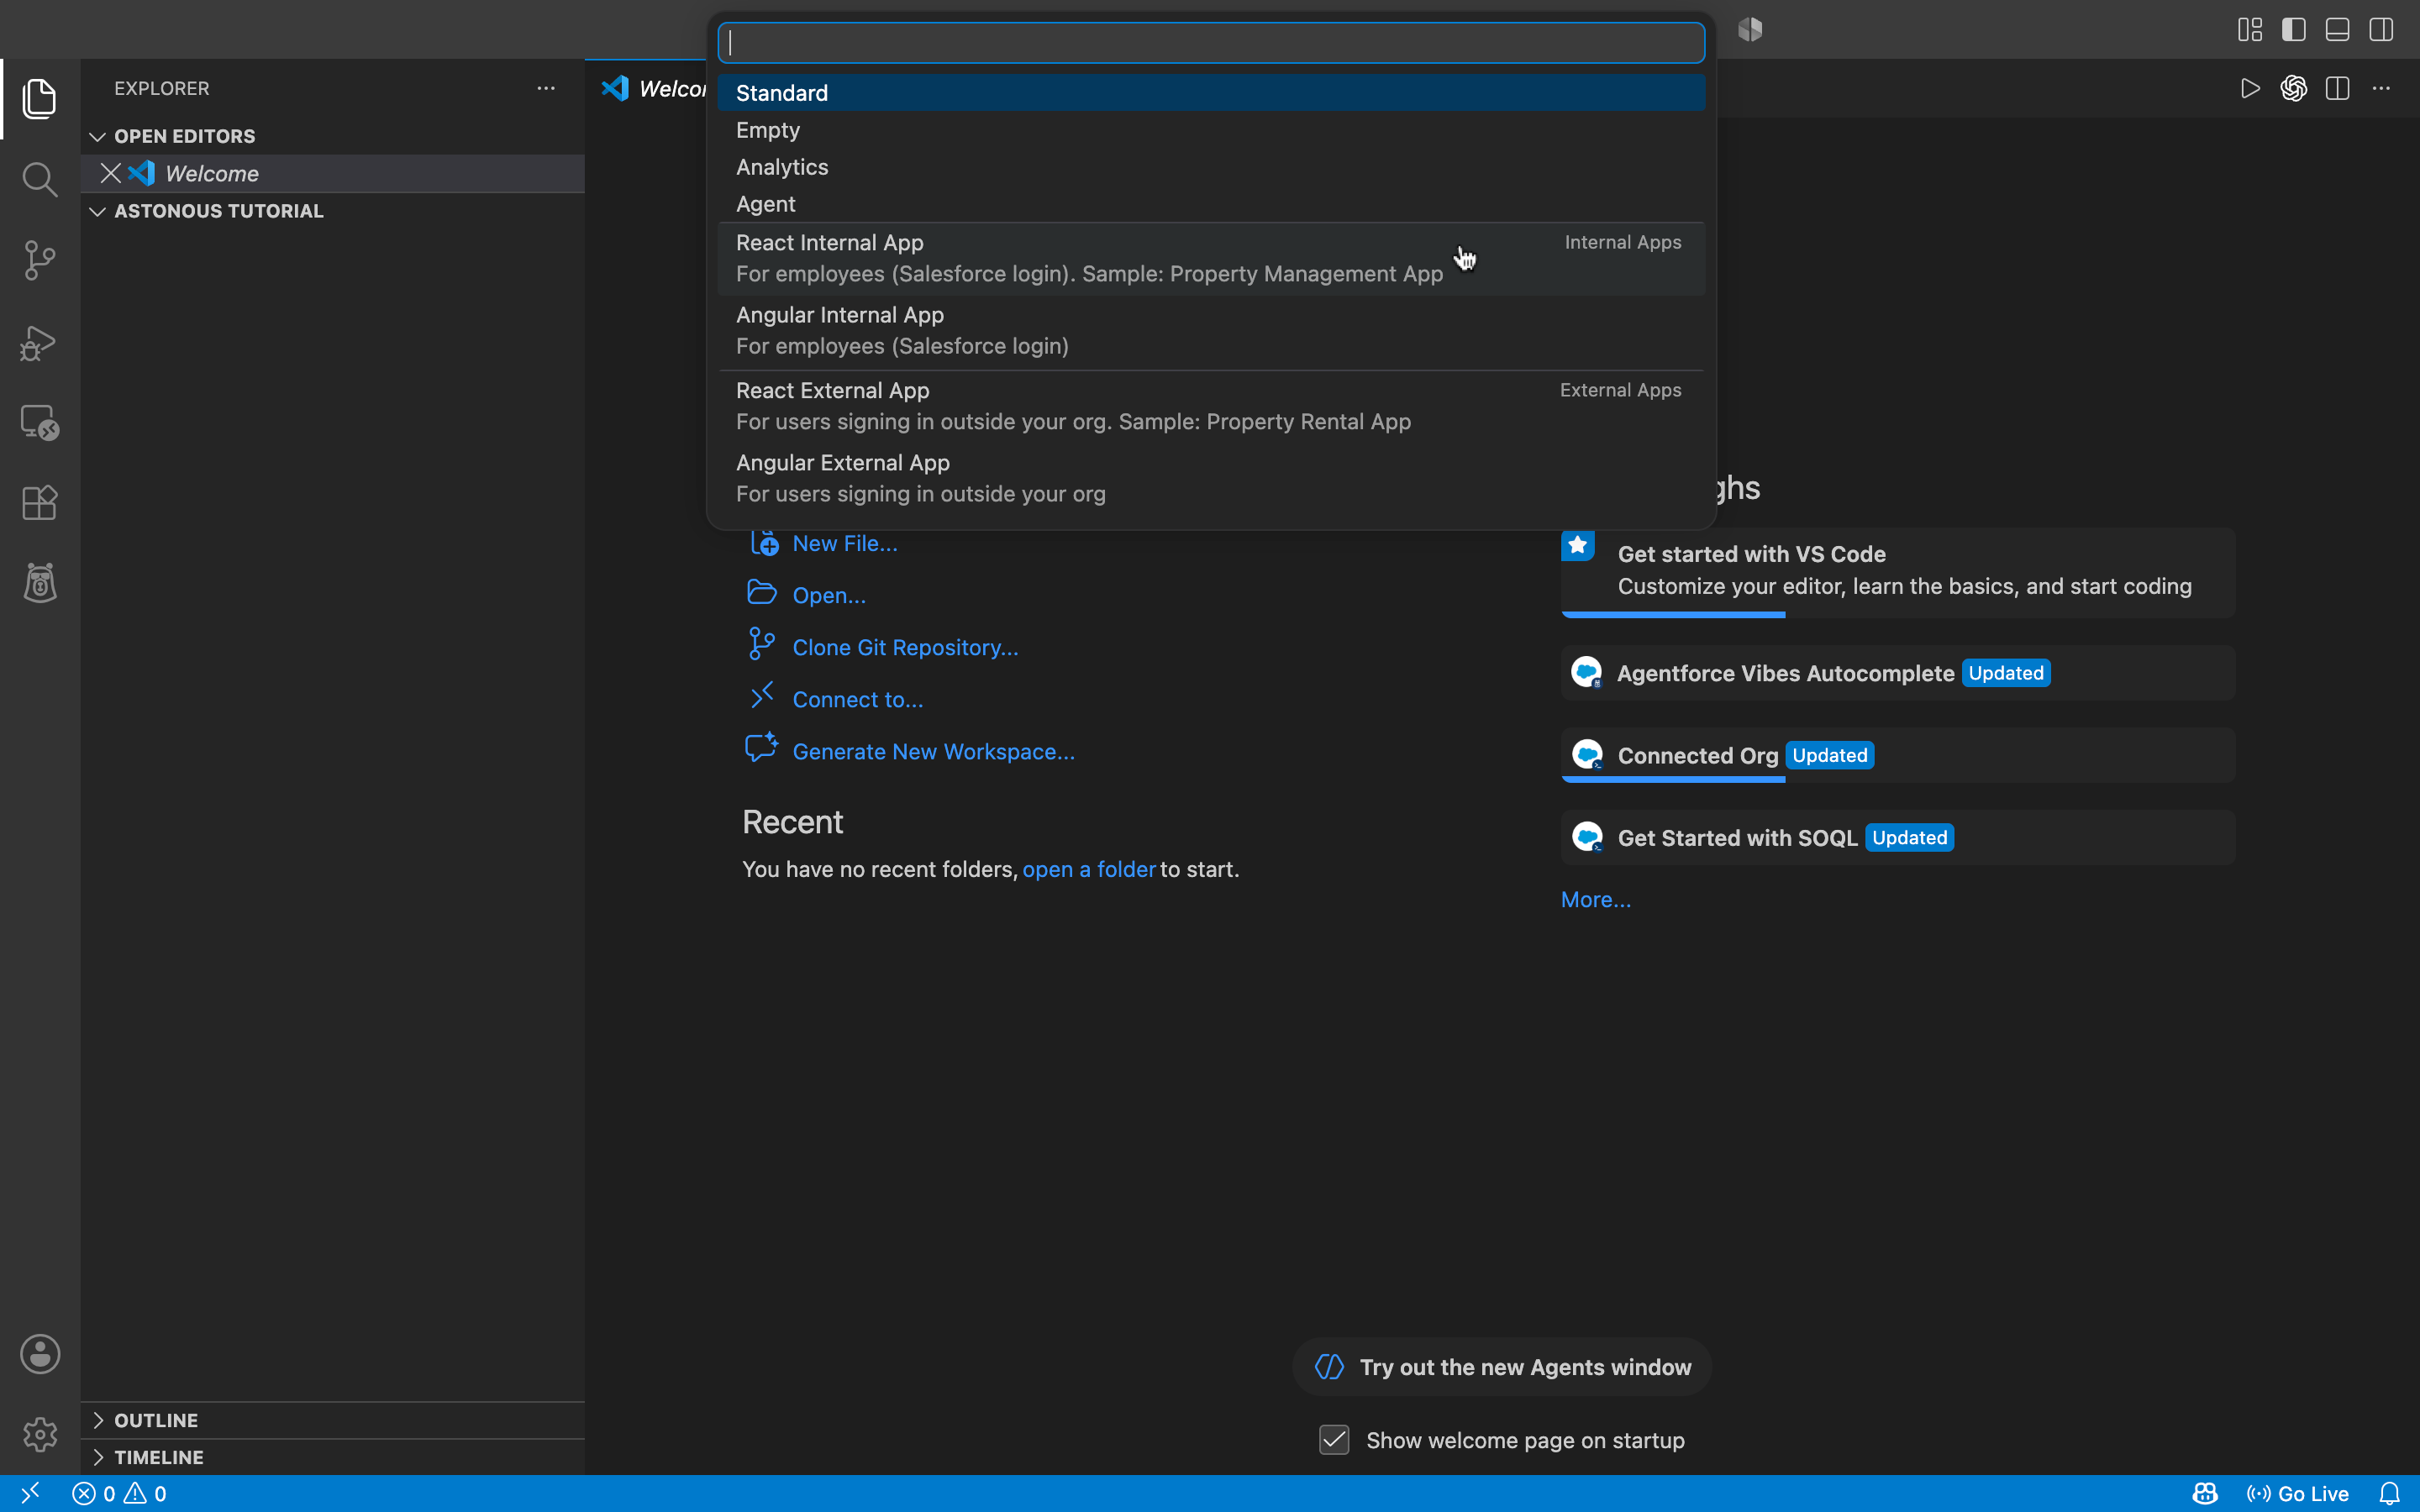
4. Choose "Internal React App" as the project type
This is the template that scaffolds the React + Vite setup specifically for a Multi-Framework UI Bundle, as opposed to a customer-facing Experience app.
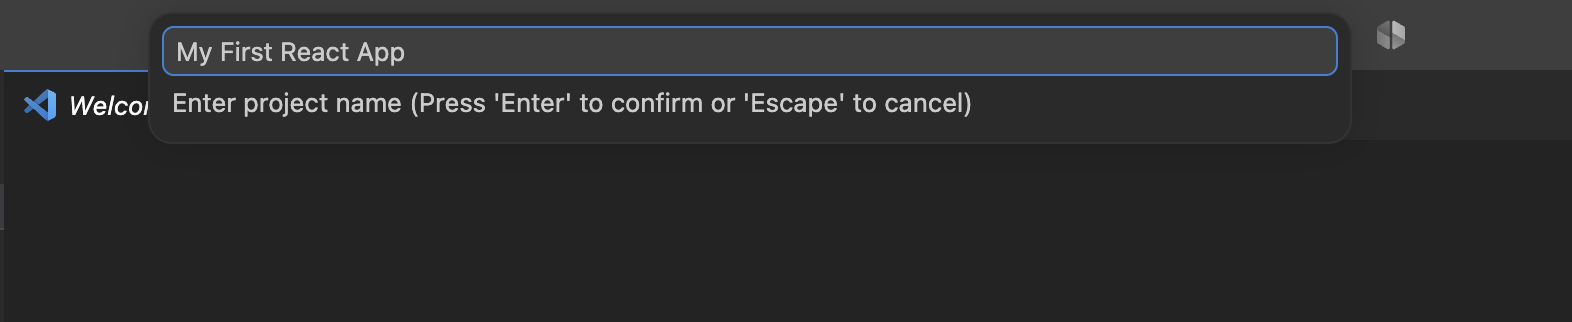
5. Name your app
For example, My First React App. Keep it descriptive; this name shows up in your bundle and Custom Application metadata later.
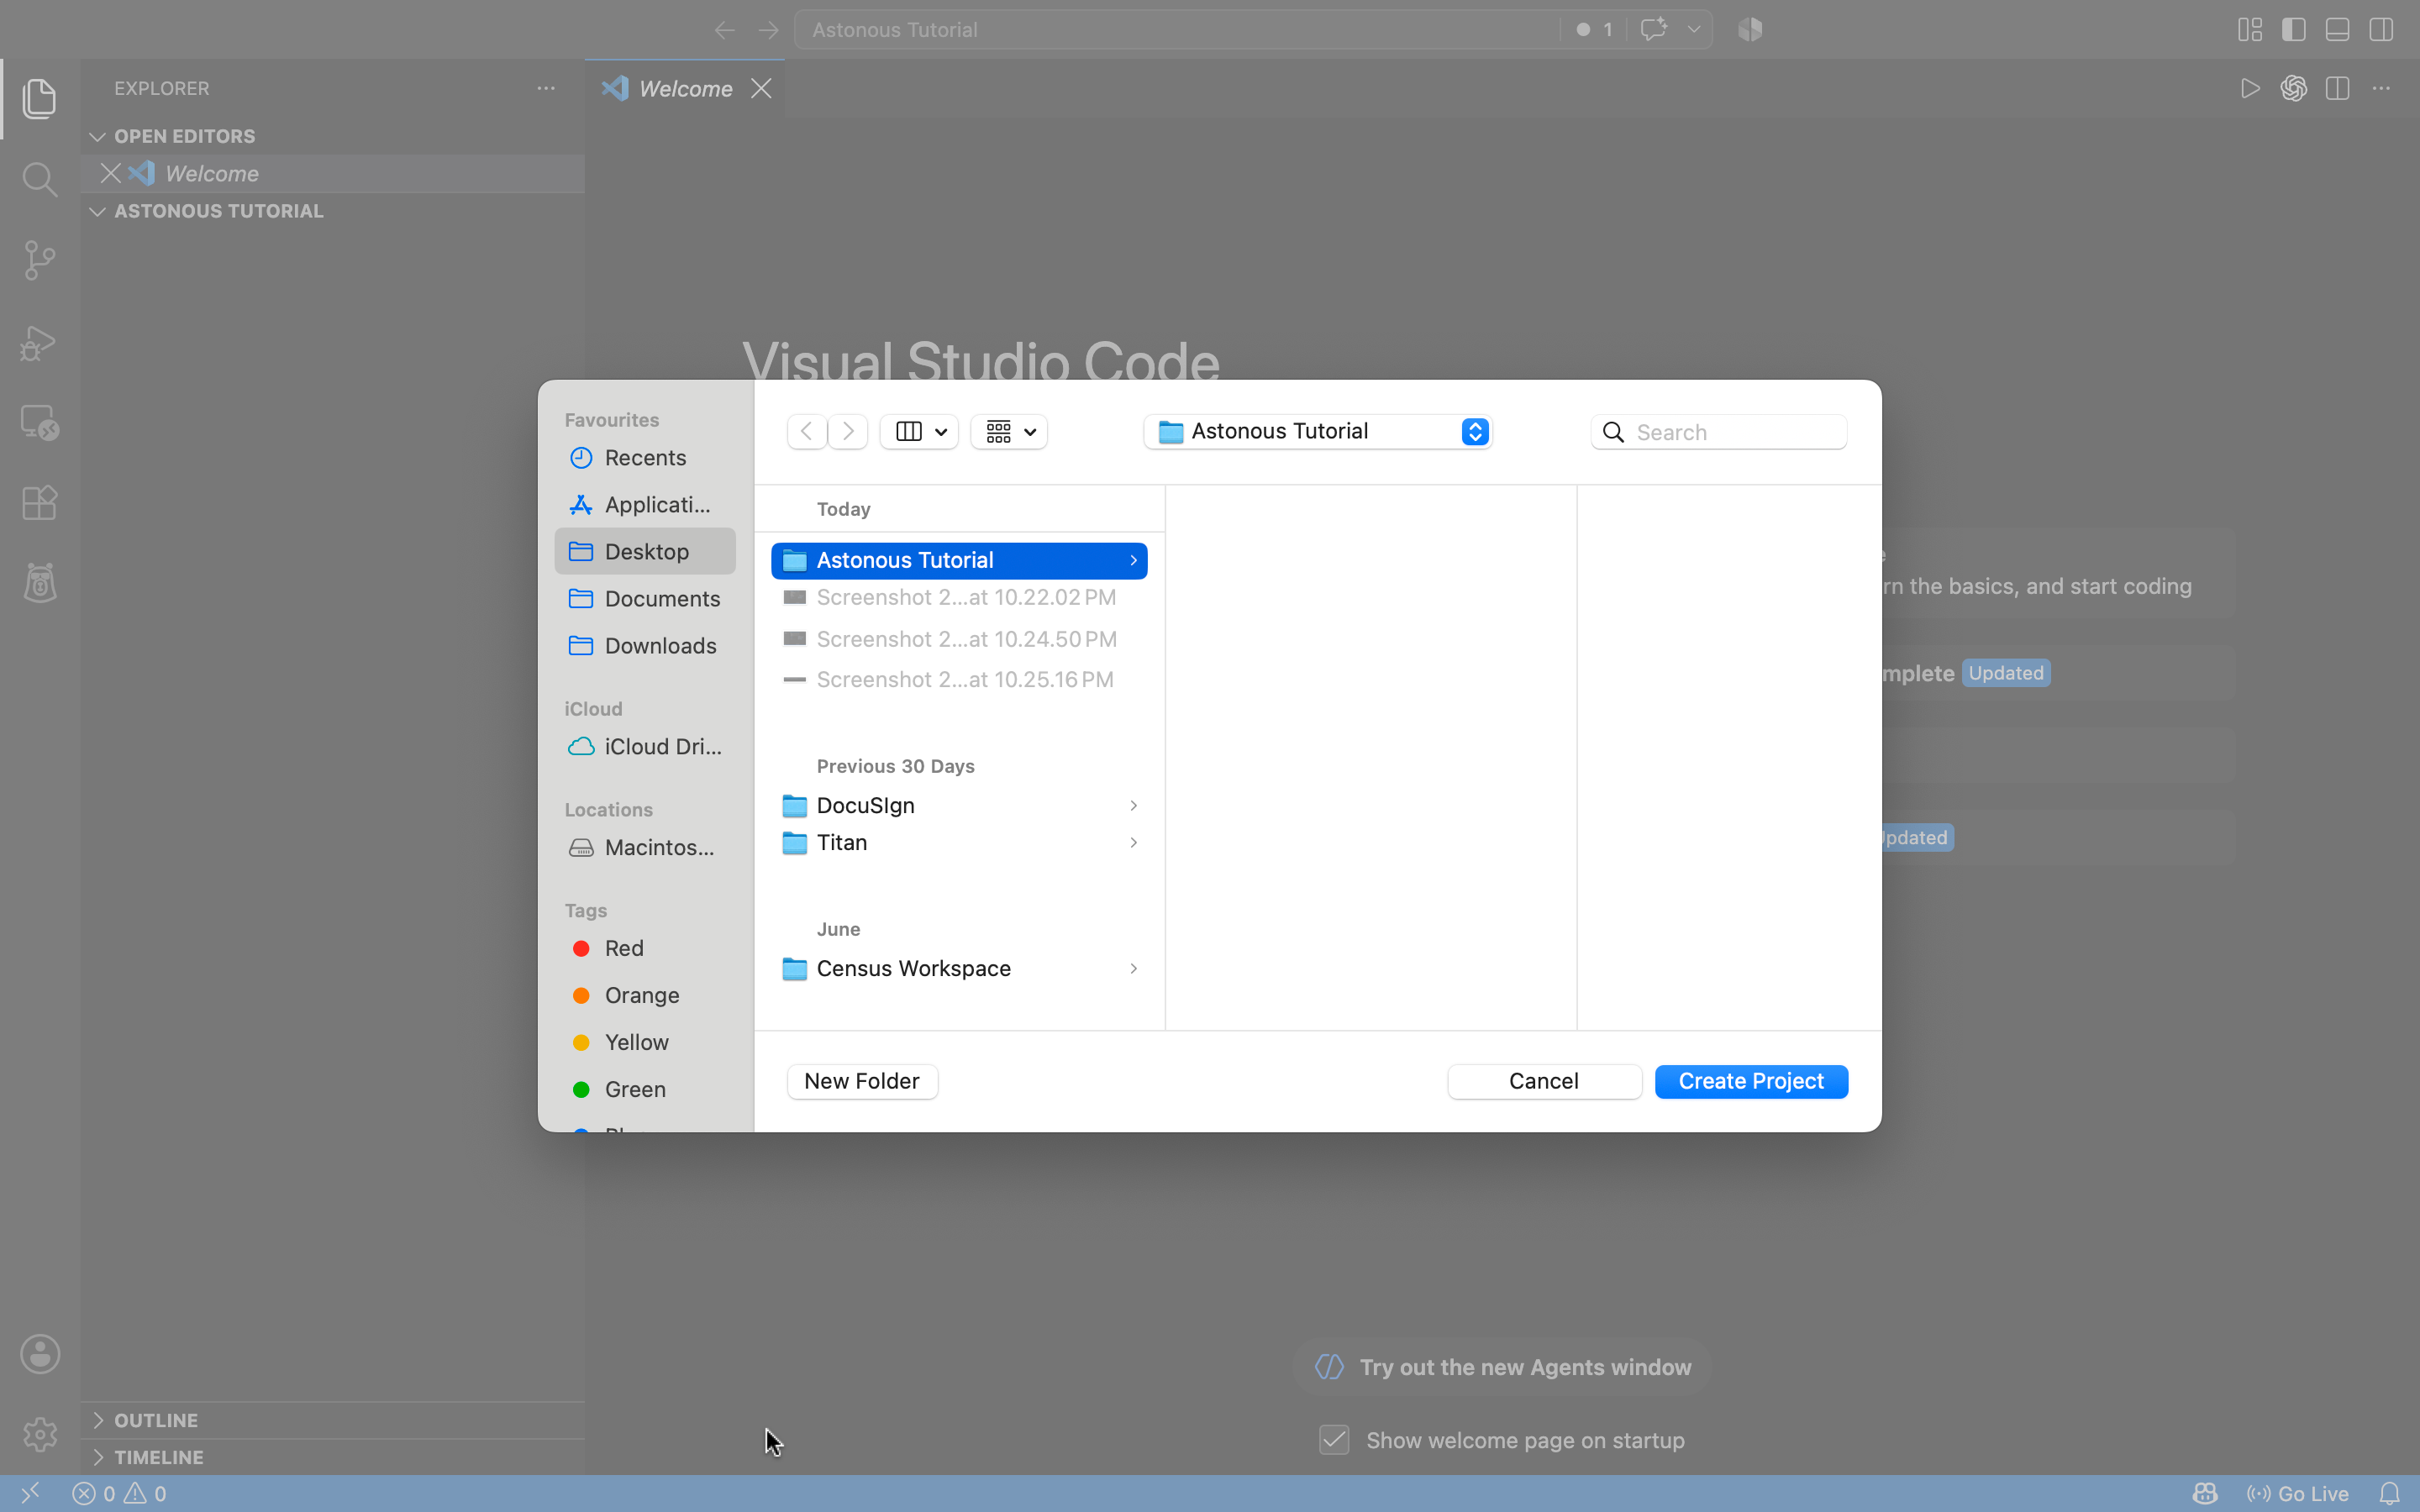
6. Choose your project folder
If prompted, pick the local directory where the project should be created.
7. Let the scaffolding do its job
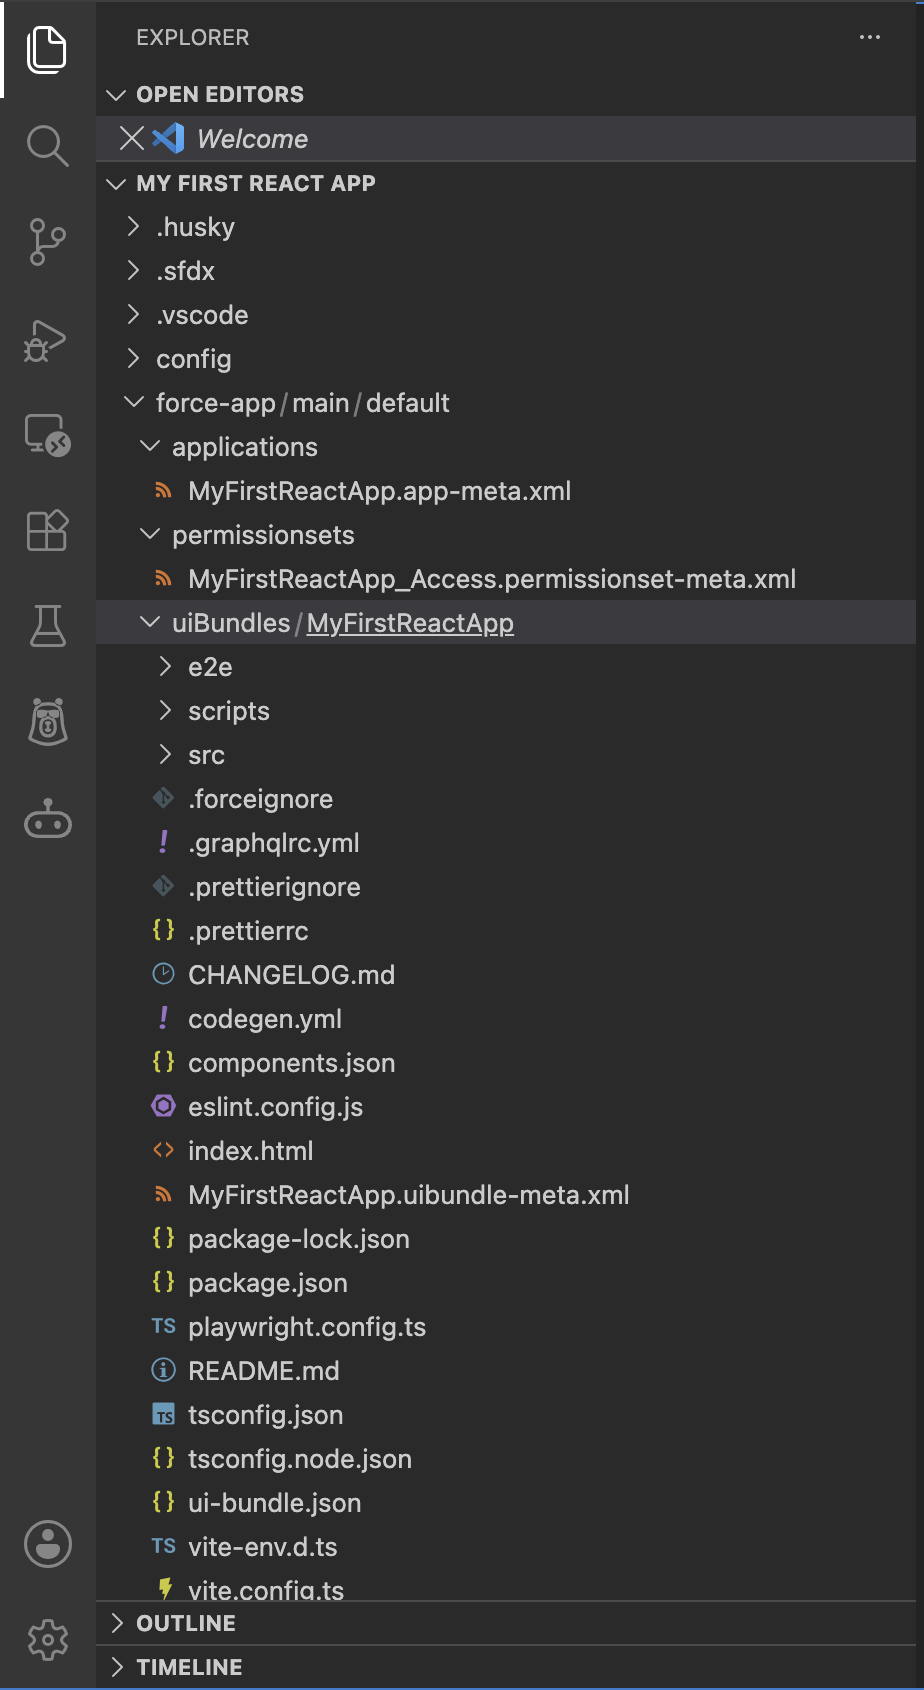
At this point, VS Code sets up:
- A Salesforce DX project
- The UI Bundle structure
- A React + Vite development environment
- A Custom Application metadata stub
- A Permission Set to control visibility
8. Confirm the UI Bundle Dev Plugin is installed
Check your installed plugins:
sf plugins
You're looking for something like ui-bundle-dev 1.2.4 in the list. If it's missing, install it:
sf plugins install @salesforce/plugin-ui-bundle-dev
9. Move into your UI Bundle directory
cd force-app/main/default/uiBundles/MyFirstReactApp
10. Install dependencies
npm install
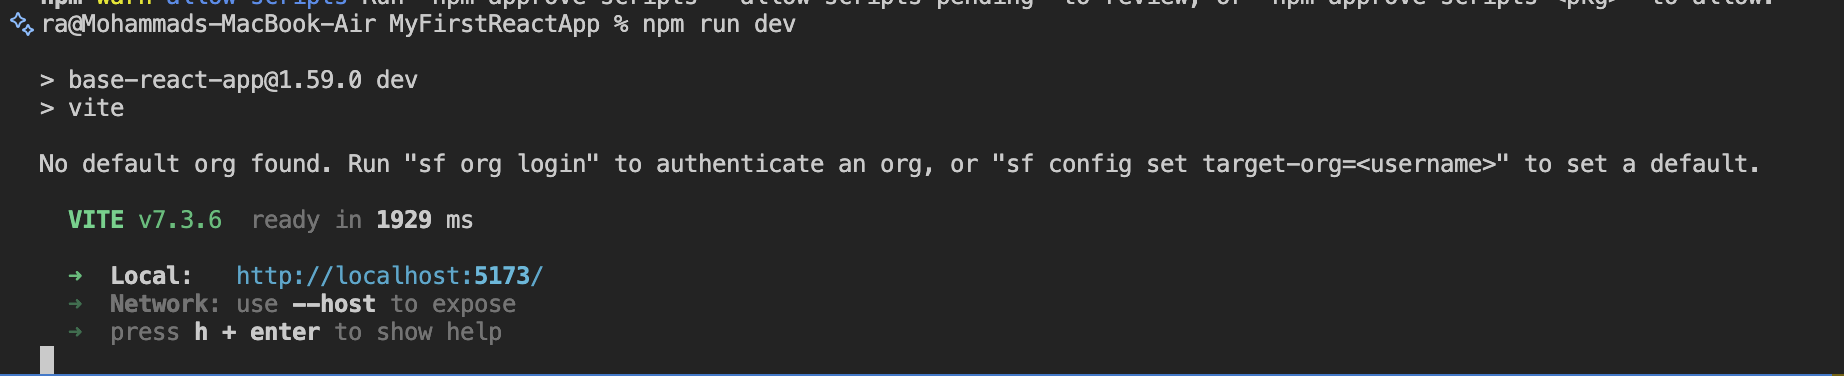
11. Start the local dev server
npm run dev
This spins up your React app on localhost.
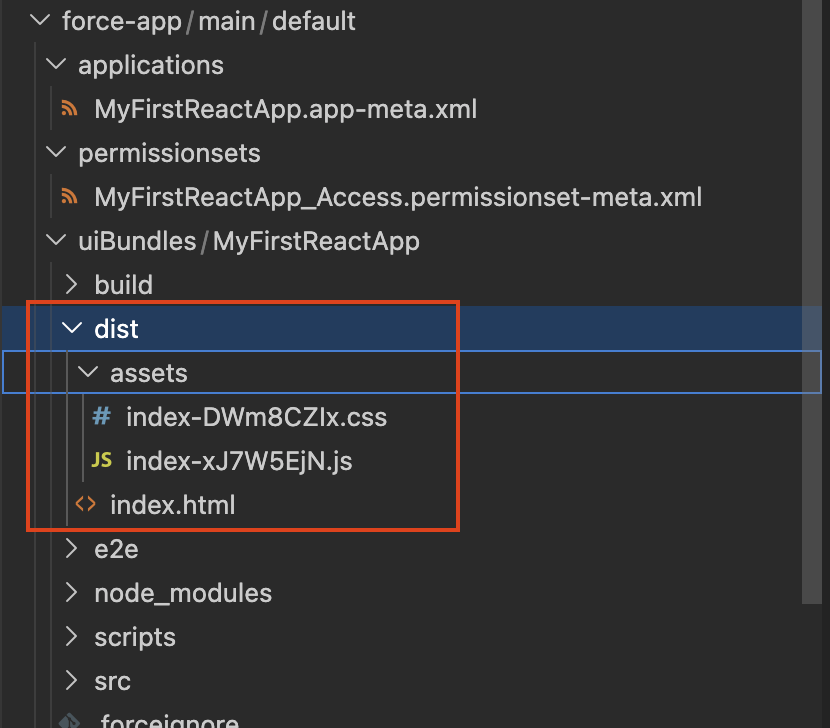
12. Build for production
npm run build
This compiles your app into a production-ready bundle of static assets.
13. Deploy to your org
sf project deploy start --target-org <org-alias>
For example:
sf project deploy start --target-org ReactDemo
14. Assign the permission set
sf org assign permset --name <permission-set-name>
For example:
sf org assign permset --name MyFirstReactApp_Access
This grants access and visibility to the deployed Custom Application. Skip it, and the app is deployed but invisible.

15. Open your org and find the app
Go to the App Launcher and search for your app by name.
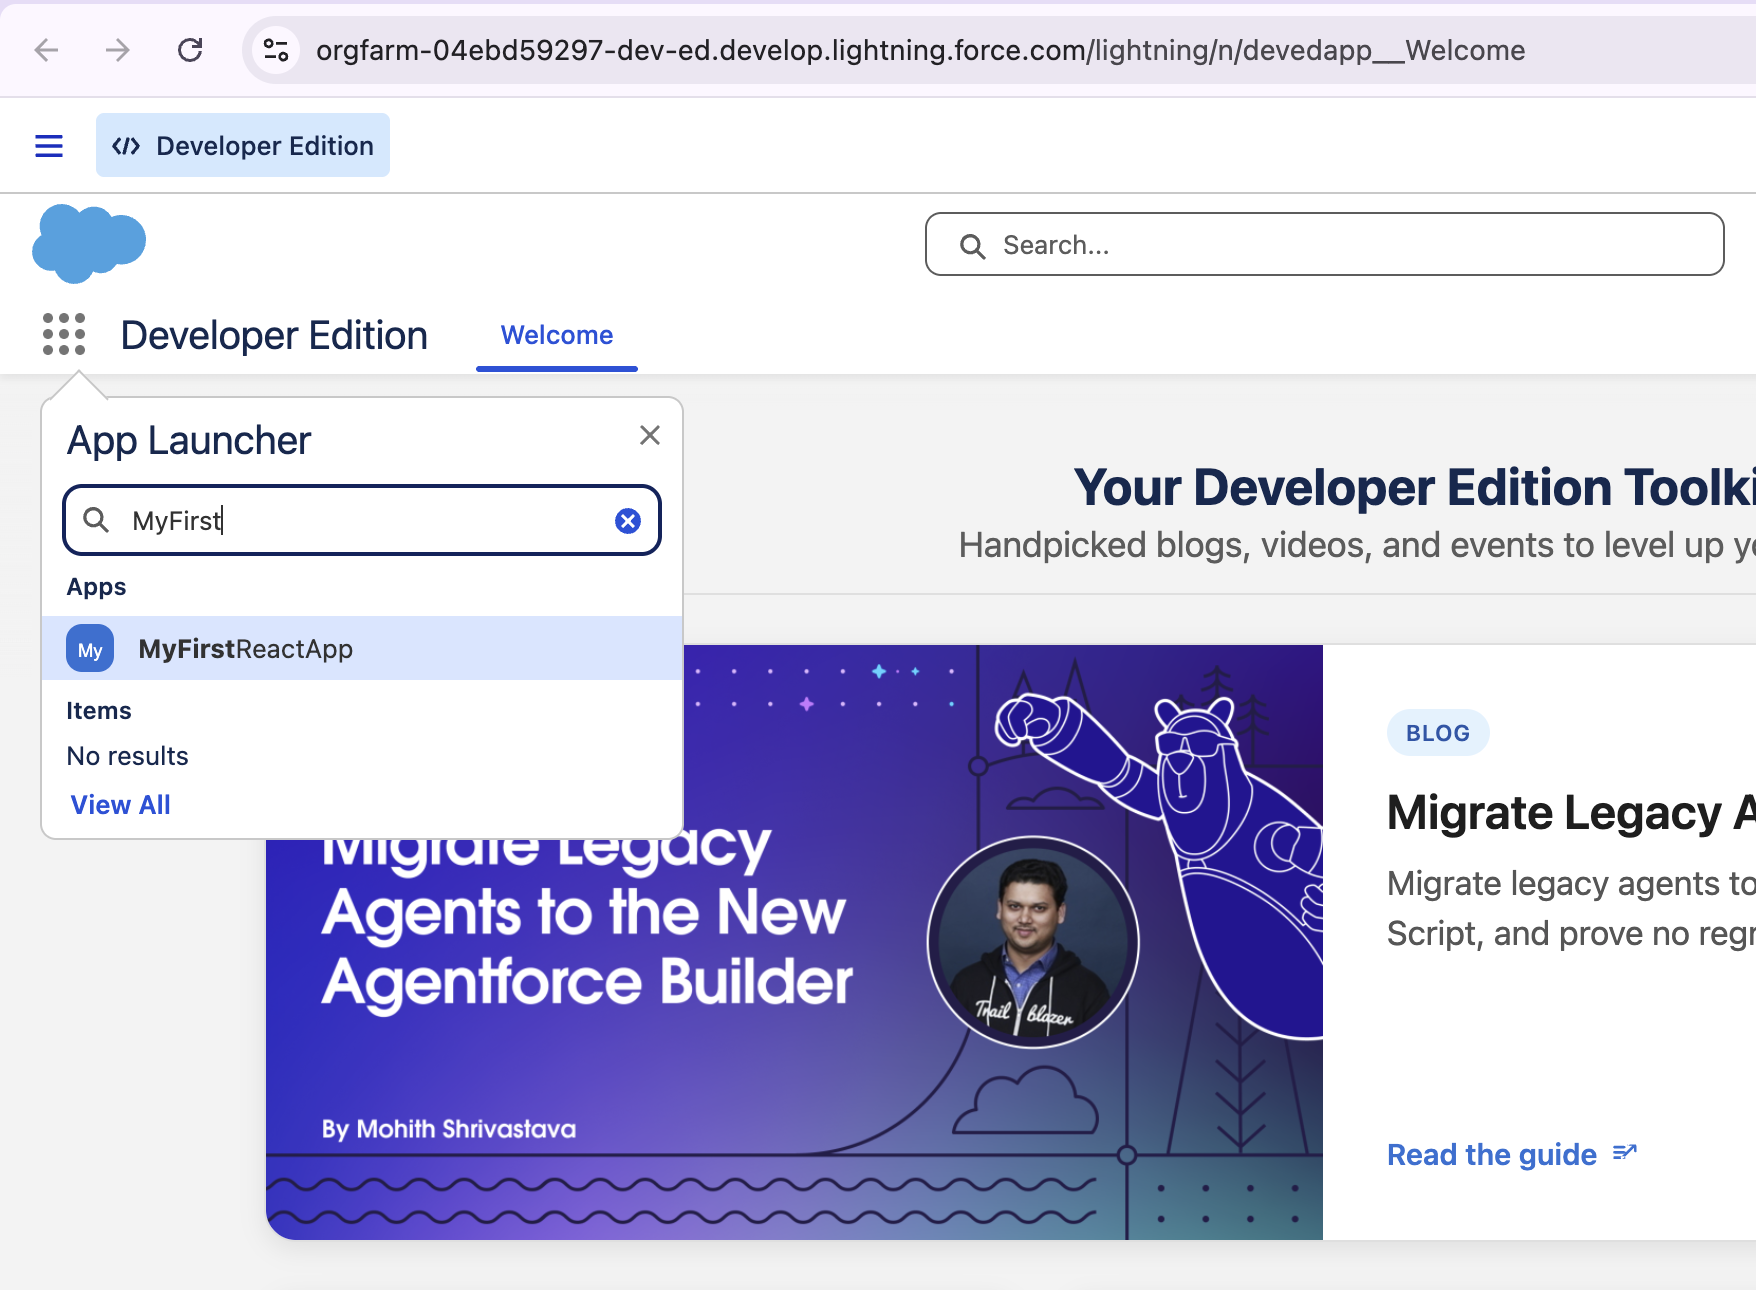
16. Click in and confirm it opens
It should launch on the salesforce.app domain. You'll notice the URL looks different from your usual Lightning pages, something like:
https://<org>--<namespace>.<instance>.my.salesforce.app/app/c__myReactApp
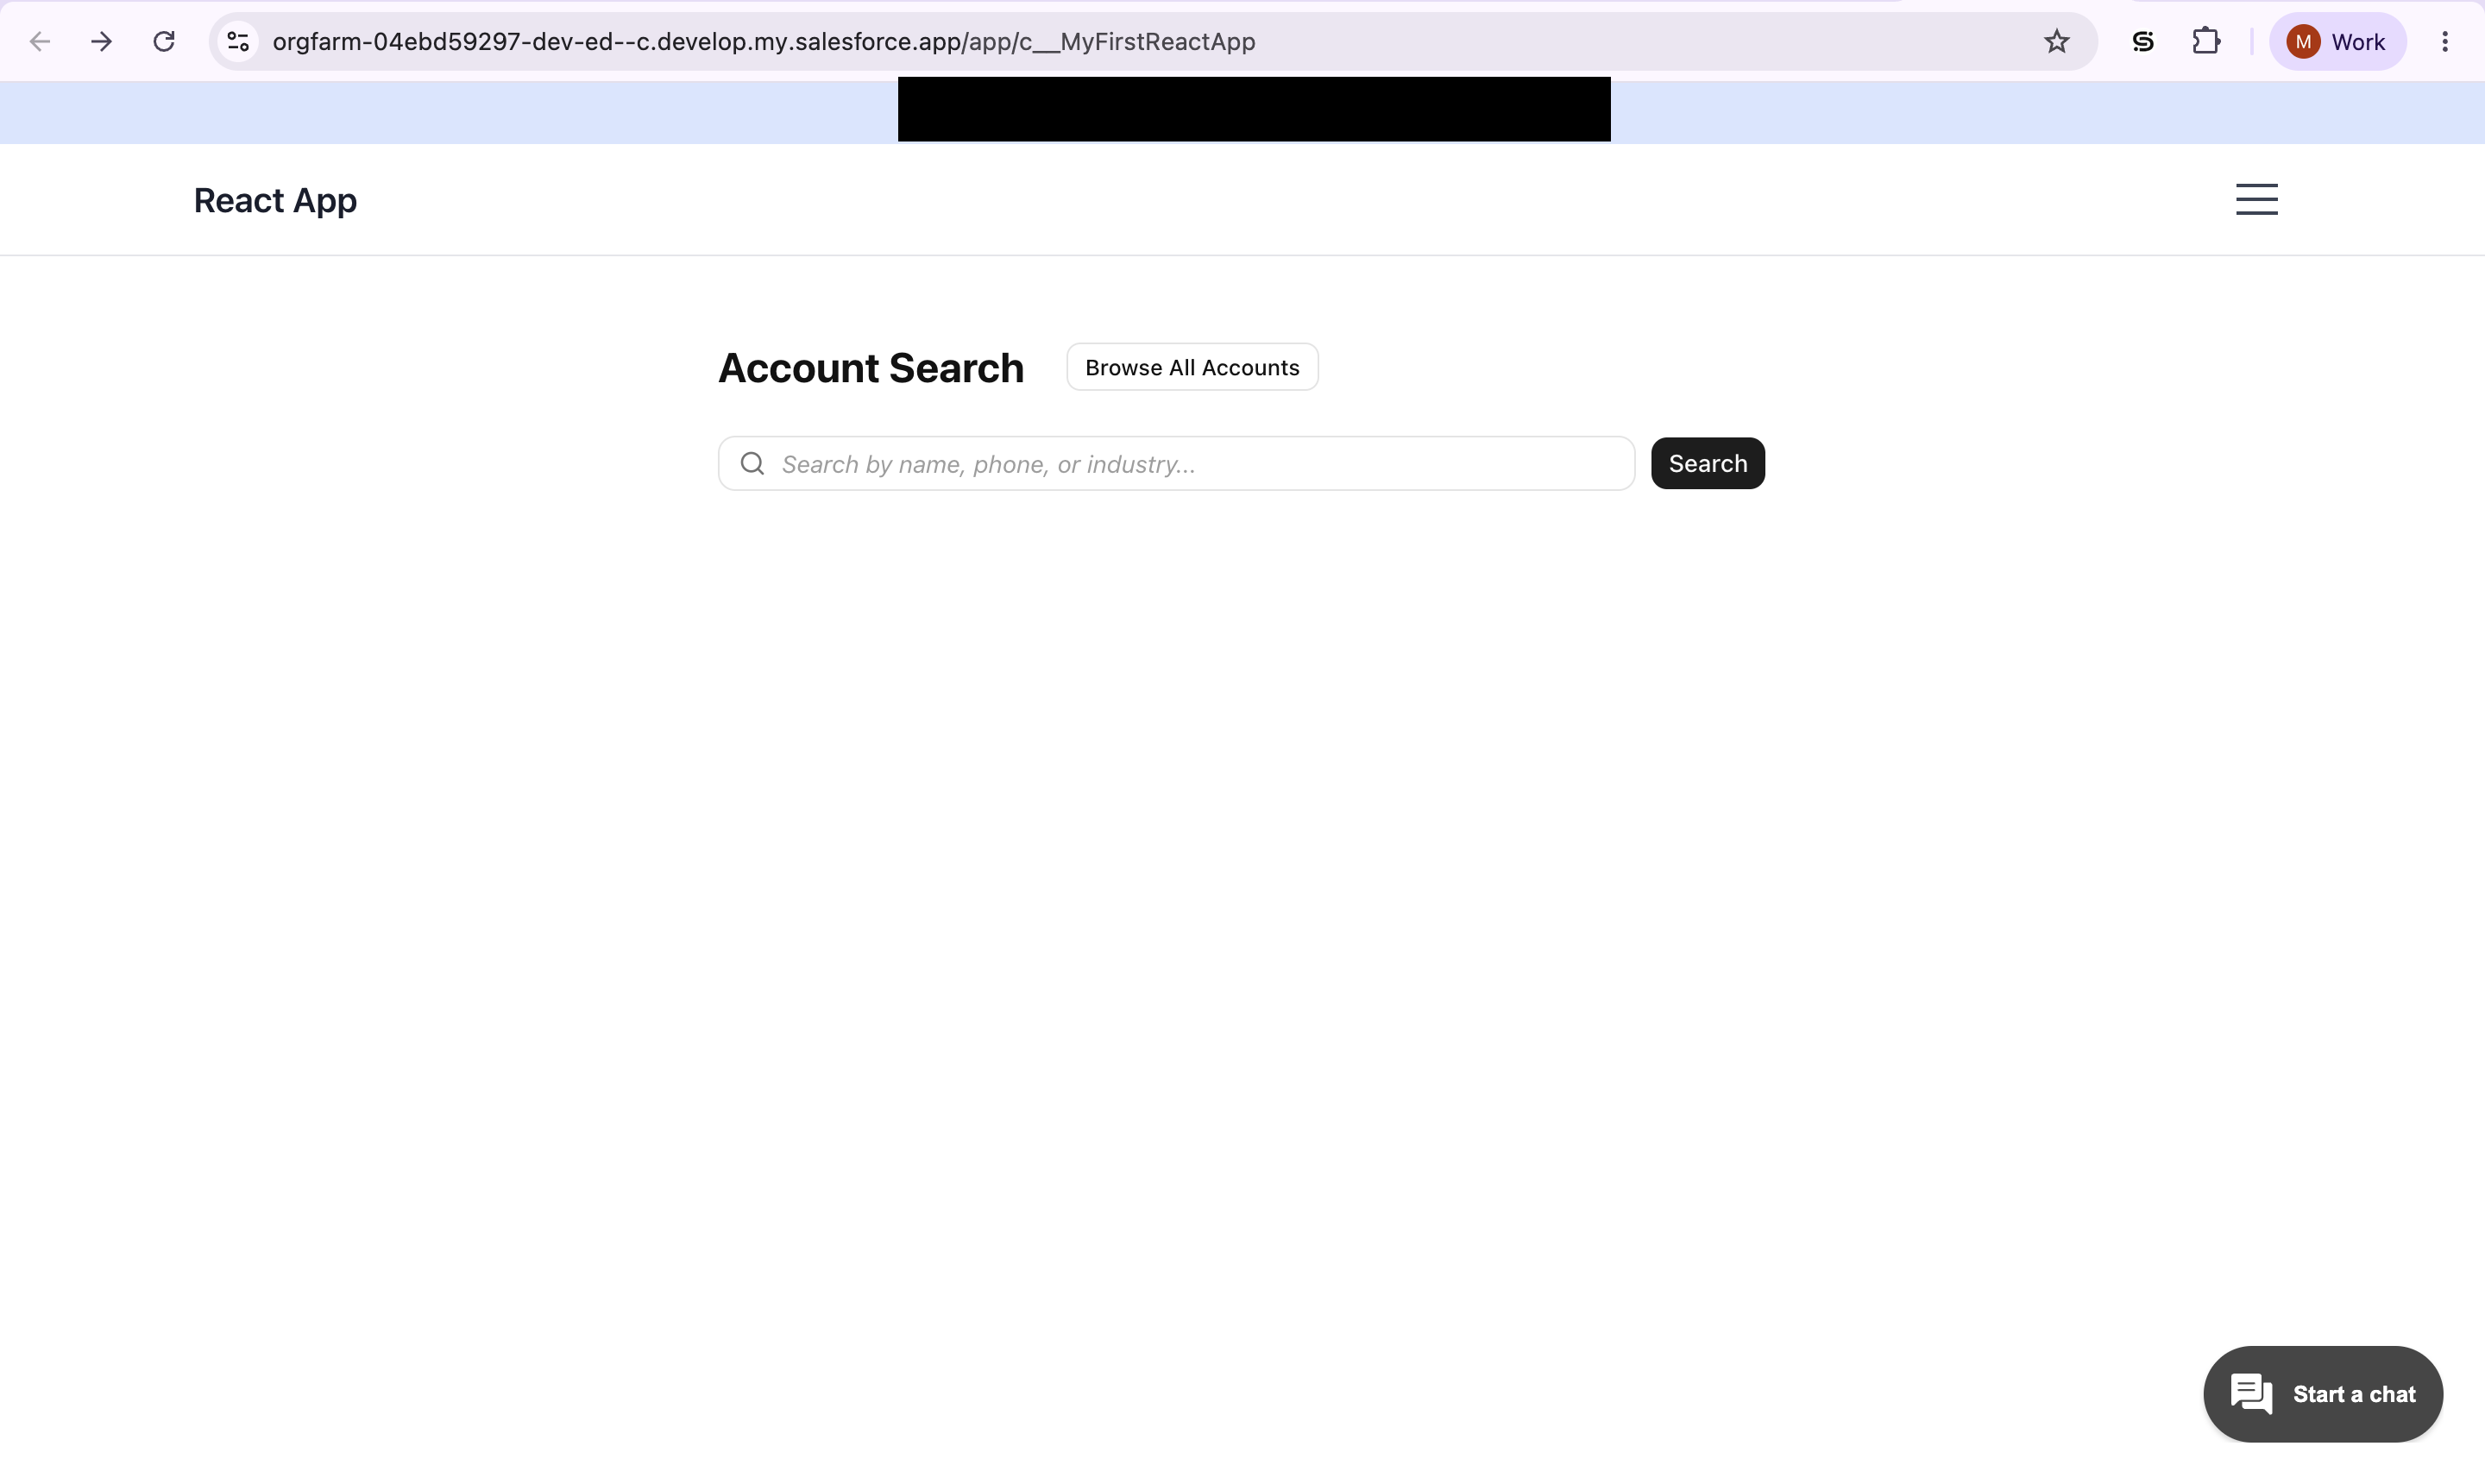
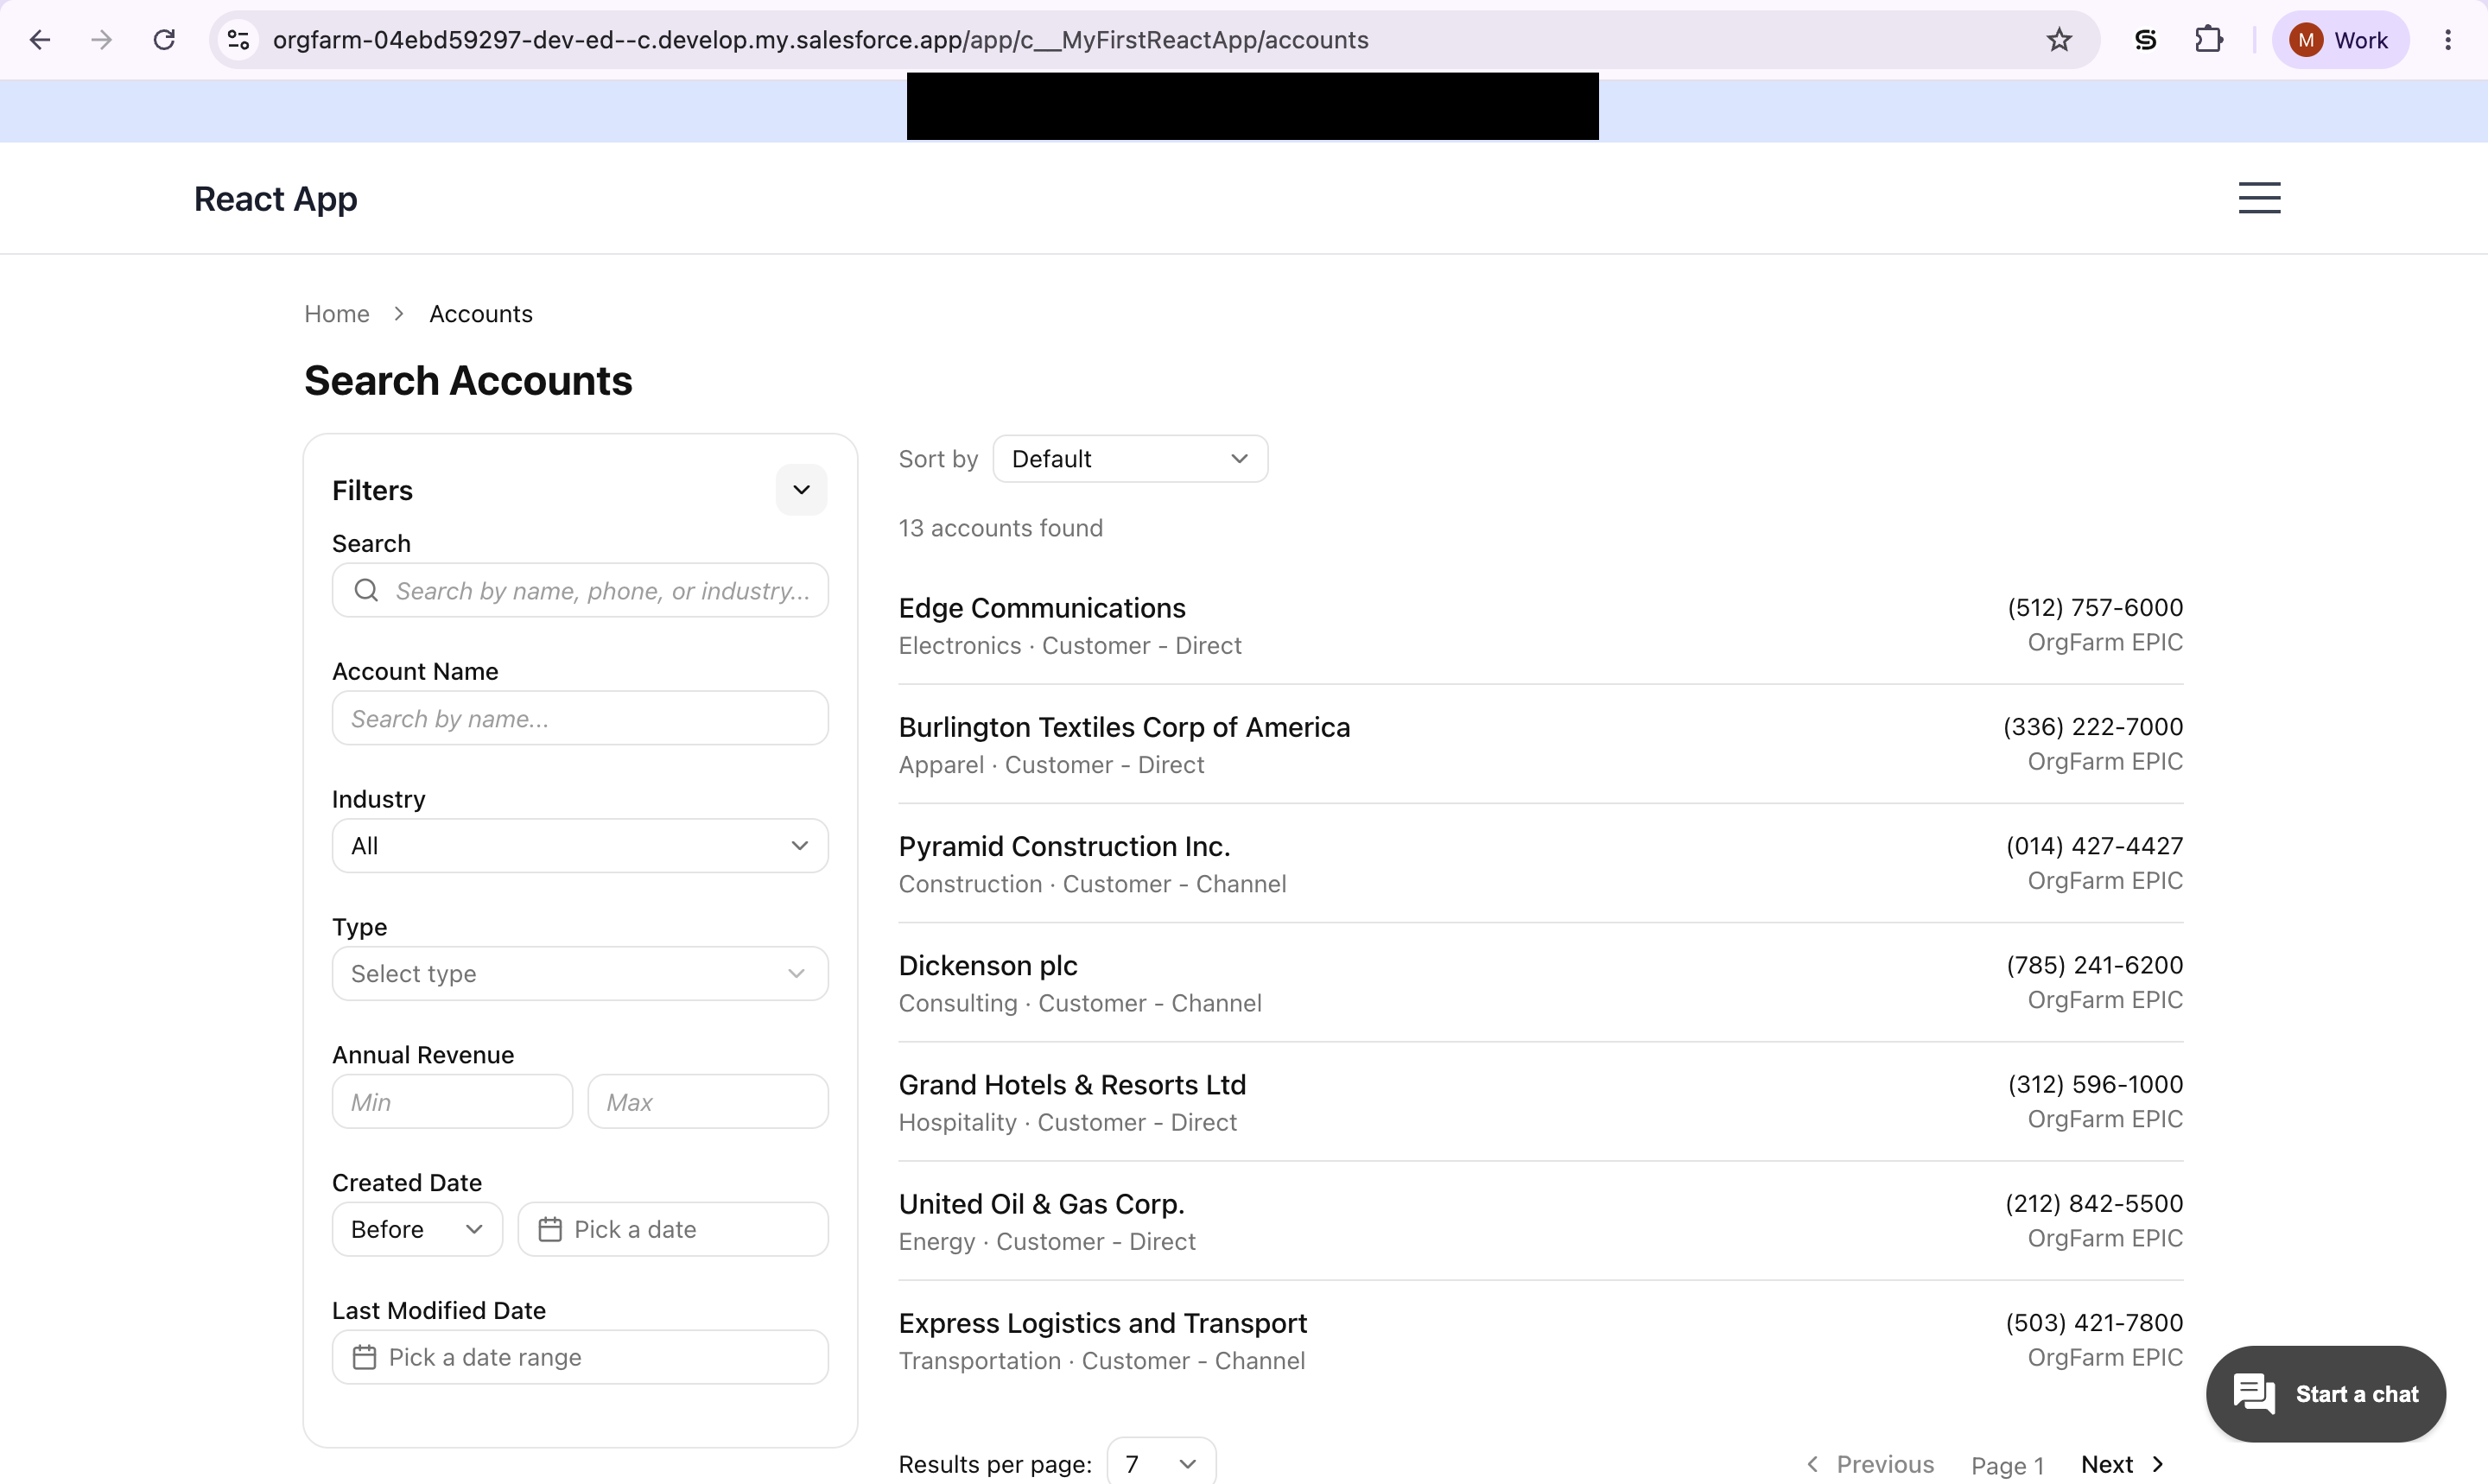
17. That's it — you've got a native React app running inside Salesforce
Conclusion
Salesforce Multi-Framework gives developers the flexibility to build modern UIs with frameworks like React while keeping the application within the Salesforce platform.
In this walkthrough, we built a React app, packaged it as a UI Bundle, deployed it with Salesforce CLI, and made it available through the Salesforce App Launcher.
If you're comfortable with React and Salesforce, Multi-Framework opens up another practical way to build applications on the platform.
.png)